How to replace broken suspended ceiling keel accessories?
Author:Yishun Time:2026-06-21 14:37:45 Number of views:82Second-rate
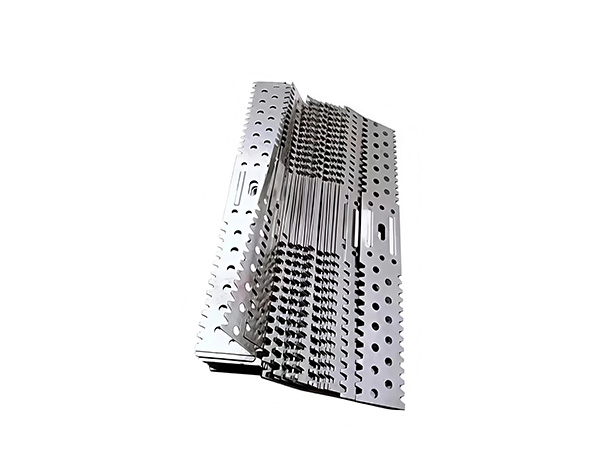
Broken, rusted, deformed or loose ceiling keel accessories will weaken the bearing capacity of the suspended ceiling grid, causing sagging gypsum boards, tile displacement and potential collapse hazards. Timely and standardized replacement of damaged hangers, clips, splices and wall brackets restores the structural stability of the ceiling system. The following guide covers safety preparation, disassembly steps, new fitting installation and post-repair inspection, applicable to both concealed gypsum keel systems and exposed T-grid mineral tile ceilings (Salkhordeha & Soroushian, 2025).
1. Pre-replacement Safety & Preparation Work
Safety protection setup
Place stable scaffolding or a heavy-duty step ladder directly below the damaged area. Wear anti-slip gloves, safety goggles and a safety harness for high ceilings above 3 meters. Clear all furniture, electrical equipment and valuables underneath to avoid damage from falling ceiling materials.
Partial ceiling disassembly preparation
Exposed T-grid ceiling: Lift out the ceiling tiles around the broken accessory first and set them aside safely.
Concealed gypsum board ceiling: If the damage is local small area, only remove 1–2 pieces of gypsum board covering the faulty fitting; for widespread failure, remove panels section by section to avoid large-area collapse.
Tool & material preparation
Prepare matching new complete accessories of the same size and material (galvanized / stainless steel). Tools needed: adjustable wrench, needle-nose pliers, rubber mallet, electric screwdriver, measuring tape and anti-rust touch-up spray.
Temporary support reinforcement
Insert temporary wood support poles vertically under the main runner close to the broken accessory to bear ceiling weight during replacement, preventing sudden sagging or falling.
2. Step-by-step disassembly of damaged keel accessories
Case 1: Replace broken U-type suspension hanger
Use two adjustable wrenches to loosen the upper and lower lock nuts on the threaded suspension rod simultaneously.
Slide the old damaged hanger down along the rod and separate it from the main keel flange. Remove the failed anti-drop spring clip together.
Inspect the threaded rod surface for rust or thread deformation; replace the entire suspension rod if threads are corroded and cannot lock nuts tightly.
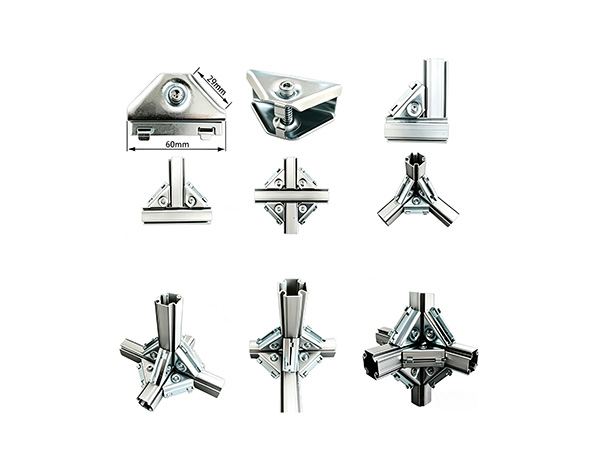
Case 2: Replace deformed cross keel furring clip
Use needle-nose pliers to pry open the spring lock tab of the damaged clip.
Lift the cross furring channel slightly to release it from the clip’s lower bayonet.
Slide the broken clip off the bottom flange of the main runner and discard it. Check if the main keel surface has dents caused by the deformed clip.
Case 3: Replace cracked main/cross keel splice connector
Unscrew all self-tapping screws fixing the splice to the keel sections with an electric screwdriver.
Pull apart the damaged connector from the overlapping keel ends.
Straighten bent keel edges with a rubber mallet if deformation exists before installing a new splice.
Case 4: Replace rusted wall angle bracket
Remove all self-tapping screws anchoring the L-shaped bracket to the wall.
Pry off the old corroded wall angle and clean rust residue on the wall surface.
Check expansion bolt tightness; replace aging plastic wall plugs with full metal expansion anchors for fire-rated ceilings.
3. Install brand-new matched keel accessories
Confirm size and material consistency
New fittings must match the original keel series (D38/D50/D60 main runners or 15/24mm T-grid). For damp/humid spaces, use stainless steel replacements instead of thin electroplated low-cost parts.
Standard assembly operation
New suspension hanger: Thread double lock nuts onto the rod, slide the U-hanger into position, insert a complete anti-drop spring clip, then align the main keel and tighten upper/lower nuts to lock height firmly.
New furring clip: Hook the upper bayonet onto the main runner flange, snap the cross keel into the lower slot, and squeeze the spring tab for double anti-drop locking.
New splice connector: Clamp two keel ends into the splice with over 40mm overlap, fasten both sides with self-tapping screws to eliminate gaps.
New wall angle bracket: Fix to the wall with metal expansion bolts at maximum 500mm spacing, rest the outermost cross keel on the horizontal edge of the L-angle.
Anti-rust supplementary treatment
Spray cold galvanizing paint on cut steel edges, drill holes and scratch areas of galvanized accessories to seal exposed metal and avoid early rusting. Stainless steel fittings do not require extra coating.
4. Post-replacement flatness test & reinforcement
Remove temporary wood support poles slowly after all new accessories are fully locked.
Push the keel grid lightly by hand to test firmness; no shaking, sliding or vertical displacement is allowed.
Use a laser level or 2m straight ruler to check horizontal flatness around the repair zone. Adjust suspension rod nuts if local height deviation exceeds ±2mm.
Add auxiliary reinforcement hangers or seismic anti-drop clips in heavy-load positions such as lamp openings and air duct cutouts as an extra safety measure.
5. Reinstall ceiling panels & final acceptance
Exposed T-grid ceiling: Put mineral fiber tiles back into the T-bar grid in order, ensure tight tile joint gaps.
Concealed gypsum board ceiling: Fix new or reserved gypsum boards onto cross furring channels with galvanized self-tapping screws, then fill seams with putty for finishing.
Full inspection checklist: All replaced accessories are fully locked, no rust exposure, consistent horizontal elevation, complete anti-drop safety clips installed, no loose joints on the keel grid.
Common Mistakes to Avoid During Replacement
Using mismatched small-size accessories to replace broken large fittings, leading to insufficient clamping force.
Omitting anti-drop spring clips after changing hangers and clips, creating long-term falling risks.
Failing to add temporary support poles before disassembly, triggering partial ceiling sagging.
Replacing only surface fittings while ignoring corroded threaded rods and aging expansion bolts.
Choosing cheap electroplated replacement accessories for humid or commercial public buildings, which will fail again within 1–3 years.
Conclusion
Replacing broken suspended ceiling keel accessories follows a fixed workflow: set up safety support → remove surrounding ceiling panels → disassemble damaged fittings → install matched new galvanized/stainless steel accessories with full locking → level and reinforce the keel grid → restore ceiling panels. Complete anti-drop components and anti-rust treatment must not be omitted during repair, which effectively recovers the original load-bearing and anti-corrosion performance of the suspended ceiling system and eliminates structural safety hazards.
APA 7th
Salkhordeha, M., & Soroushian, S. (2025). Seismic performance of suspended ceiling systems; A literature review. Structural Survey, 43(4), 412–435.
MLA 9th
Salkhordeha, Mojtaba, and Siavash Soroushian. "Seismic Performance of Suspended Ceiling Systems; A Literature Review." Structural Survey, vol. 43, no. 4, 2025, pp. 412–435,
GB/T 7714-2015
[1] SALKHORDEHA M, SOROUSHIAN S. Seismic performance of suspended ceiling systems; A literature review[J]. Structural Survey, 2025, 43(4): 412-435.

- Bazhou Yishun Machinery Parts Co., Ltd
- Contact:Mr Zhao
- Email: 11111111111
- Add: Zhaojiazhuang Village, Bazhou Town, Bazhou City, Langfang City, Hebei Province, China

Copyright © 2025-2026 Bazhou Yishun Machinery Parts Co., Ltd All Rights Reserved